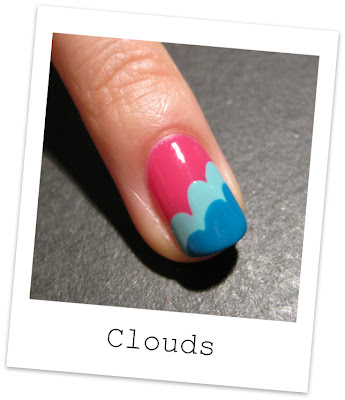
Hello everybody, welcome to this tutorial! This time I'll show you how to make the freehand cloud look. All you need for this quick and easy design is three pretty polishes and the brushes that come with it, so there's no extra equipment needed. Use this layered look on accent nails, for a full mani or... to cover up tipwear from an old mani. :) Let's get started, shall we?
First apply your basecolor and let it dry. If necessary use a basecoat underneath.
To make the cloud shape, we're simply going to apply the second polish in three strokes. Start each stroke by placing the tip of the brush on the surface and wait a little till enough polish has dripped off forming a round starting point. Start on one side of the nail and make each stroke shorter than the one before.
Tip: If your polish comes with a (big) flat brush, just twist it 90° and use the side. Now it's easier to make those round edges! ;-)
Then take your third color and make a second cloud layer below the first one. Let the polish dry.
Finally seal your work with your favorite topcoat and you're done! Pretty simple, isn't it? :)
I would absolutely love to see your attempt on my design, so feel free to leave a link to your creation in the comment section!
Polishes I used in this post are Barry M Shocking Pink, China Glaze For Audrey and Essence Let's Get Lost.


No comments:
Post a Comment