Monday 28 November 2011

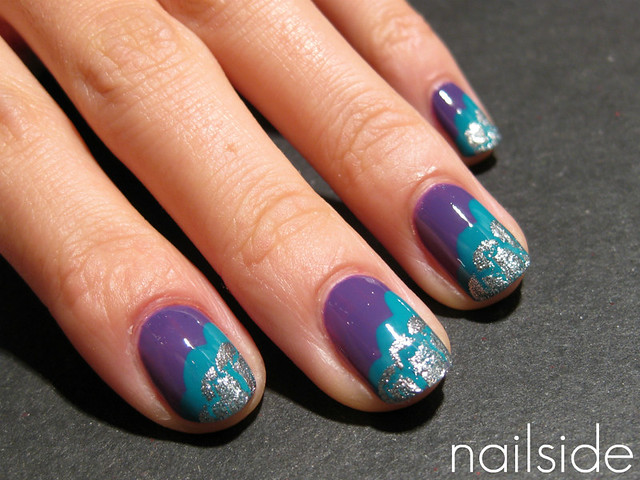
Art Deco chevrons


Hello guys! First of all, I'd like to thank everyone who wished me a happy birthday in my last post, it was very nice to hear, but I just celebrated my birthday last month, haha. The birthday nails were specially made for a reader who requested a birthday mani for her own special day ;-) So no birthday presents to share with you, but I do have these elegant chevrons in Art Deco style. The pictured bottle of polish, which I used as my base color, is M91 from a new cosmetics brand called Make-Up Studio. They carry a huge, colorful collection of eye-shadows, lipsticks, blushes, brushes, fake lashes etc. and... nail polish :) They just opened a brand new store in our local shopping mall, so last week I went for a look and M91 was one of the products I came home with. It's a dusty green creme which is close to Mint in Wikipedia's List Of Colors. The formula was pretty nice but the best thing is it covers in one coat ^^ I own quite a few dusty, grey-ish greens/mints, but none of those is similar to M91. So I'm happy to have yet another one in my stash! It's a shame though, that Make-Up Studio didn't give their polishes a real name, instead of just a number. They've got quite a few unique babies in their collection that truly deserve more identity. I admit they do cost a lot (12.90 for 12ml/0.41fl.oz.) but as I said, some are really unique and worth the money, if you want to spoil yourself :) Anyhow, the day after I added the first chevrons with tape, using China Glaze's Jitterbug. The little chevrons at the tips were made with China Glaze Ink. It's a striper polish with a perfect covering formula, the thin brush is perfect for making stripes but also for freehanding, like I did here. It came in really handy, because I felt way too lazy to wait for another coat of polish to dry, like I would've if I used tape again. Finally a layer of Essence Matt top coat and tada! Thanks for reading :)

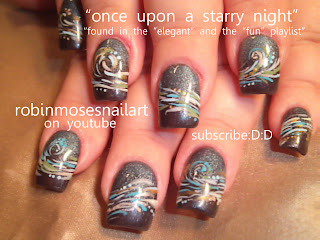
monster high nail, monster high frankie stein nail, frankie stein nail, monster high art, monster high nails, monster nail art, monster high green girl nail, blue and silver nail, pink argyle nail, blue argyle nail, winter nail, winter 2012 nail, trendy nails, nail trends 2012, starry starry night nail, starry night nail, nails done with eyeshadow, matte eyeshadow nail art, matte eyeshadow nail, nail art with pigments, pigment nail art, eyeshadow nail art, MAC shimmermint swatch,

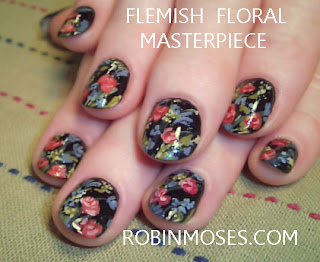
 monster high green girl, frankie stein: robin moses doll nail art tutorial 529
here is a monster high frankie stein design
and here is a starry starry night design using shimmermint mineralized pigments by MAC. i have been using eyeshadow in nail art since 1997. it enhances the design while it also adds dimension that you cannot really capture with a camera. i fully explain and do TONS of nail art designs USING EYESHADOW...please subscribe and see how i use many kinds of eyeshadows in nail art and look for tons of different techniques that make eyeshadow that much more fun..for nail art, lipgloss and more!
PLEASE if you copy, say "inspired by robin moses" or if you are inspired by any other artist, please say "inspired by _______" so we can give credit to each other and create a positive community full of designs that are continually evolving and growing without breaking apart from jealousy and hurt feelings. it is important to me and many other artists that you do this! my love to you guys :D:D more to come! 

Saturday 26 November 2011

"LET IT SNOW" A COLLABORATION INVITATION!!!! 12/05/2011

Birthday nails


Hello everyone! I hope you're all doing fine :-) I am, it's just a little hectic right now which is the reason of me posting so little lately. But I've got many new ideas to post once things slow down a bit, including tutorials and perhaps the start of my attempt on the 31 day challenge! I'm so looking forward to it! :)

For this post I'd like to share this birthday mani with you that I made for one of my dear readers. Since I am always occupied with other things that need to be arranged on my own birthdays, and usually just end up with a simple creme or glitter on my nails because of the lack of time, I decided to make something cute that's not too difficult or time-consuming to recreate. My accent nail, is (obviously) a birthday candle! I began with three coats of yellow (M67 by Make-Up Studio, a new brand!). Then I used a pink for the "cake". Once it had dried I added the candle, the little flame and wick, and there you have it :) On the rest of my nails I'm wearing China Glaze For Audrey. I painted the irregular stripes that I'm so into lately, with a white French manicure striper. What I love about those is how opaque most of them are, as opposed to regular white polishes. To complete the party look I added an iridiscent glitter (OPI Last Friday Night), it's sparkly and still reveals the stripe design underneath. And that's basically it! Happy Birthday! ^^


Wednesday 23 November 2011

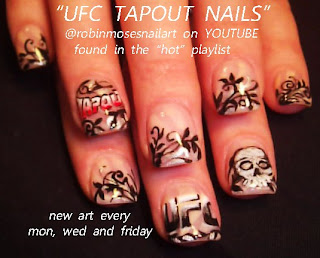
UFC NAILS, TAPOUT nails, ultimate fighting nails, sports nails, football nails, pom poms nails, black and silver filigree nail, black silver nails, cheerleader nails, mma nails,


BOTH UFC NAILS AND FOOTBALL NAILS CAN BE FOUND HERE

both tutorials are found in my sports playlist: link above......here are two cute sports nail designs for the football weekend and just for sport lovers in general. i hope you all have a wonderful holiday for those who celebrate it and for those who do not, just have a great weekend! please, if you watch the videos-- thumbs up them and favorite them to your youtube because youtube sees that you guys like them and they notice my channel more and make it more possible for other girls to find me who love art, so please help by doing those small things. :) my love to you guys!!!

Jitterbug's BBQ


Hello everyone! I can't believe it's already been five days since my last post! This week's been so busy, that after I had removed this mani, I didn't even have the time or energy to repaint my nails. They're actually still naked! But I'm planning on changing that tonight :) Anyhow, for right now I have this diagonal tape mani to share with you. My base color was OPI Mrs O'Leary's BBQ. But when it started showing tipwear, I decided to add Jitterbug from China Glaze to the tips, using tape. The base color was already dry, so it only took me a little while to create a fresh mani.
Talking about Mrs O'Leary's BBQ and Jitterbug, you may have seen this color combination before here, in my (matte) V-gap post, I think they make a happy couple :) Thanks for reading and see you soon!

Monday 21 November 2011

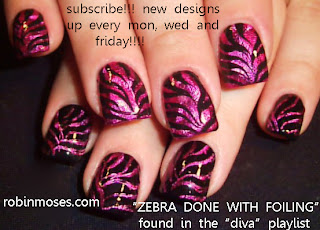
magenta nails, pink and black zebra nail, zebra foil nail, zebra nail foil, magenta zebra, eleganza extravaganza, red nails, autumn nails, rust nails, rust red nails, rusted nails, silver accents, silver bling, robinmosesnailart


hello! if you are watching my videos, please thumbs up, comment and favorite the videos you like. here is why. if i get lots of that type of activity, youtube is NICER to me...meaning my videos get featured more and then they find girls who want to learn and i am more exposed than if i get little activity. i dont like how some people beg all the time to do this, but i understand why now. if you are already watching, can you please just take a few extra seconds and do this, it really helps me achieve my goals and keep posting more. (this also is the case with the +1 thing below on this blog..the more +1's you get, the more your pics can be seen in engine searches...so, do this for everything you guys love and do it for me if you are already here and looking :) have a great day and see you wednesday with more!!! thank you guys so so much :D 

Sunday 20 November 2011

the ray william johnson give away winner!

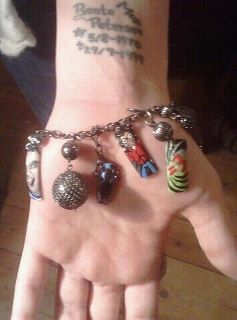
so, i got to send the bracelet i made of ray william johnson to denmark to the nicest girl ever. she promised me a kindney and it is on film so i am going to take one someday :) haha!!! no, but seriously....it was a lot of fun to do this give away and also get recognized on ray's facebook.  so very cool. so...without further ado here is the bracelet clear around the world, to it's rightful owner. it looks fantastic on you and congratulations Charlize :)

Friday 18 November 2011

Guest post for Oooh Shinies


Hello everyone, I'm proud to tell you that the lovely and talented Bregje from Oooh Shinies has asked me to make a guest post for her blog, of course I said yes! :)
So head over to Oooh Shinies for the complete post or click here.

paul frank monkey nail, monkey nail, rainbow monkey nail, paul frank art, fall nail art, beginner nail art, nail art for beginners, easy nail art, easy nails, simple nails, fun nails, thanksgiving nails, nail ideas,

NAIL ART FOR BEGINNERS: "A Flash of Autumn Color": robin moses fall colors design tutorial 509

 
here are paul frank monkey nail art ideas and also a very simple fall color tutorial :) please subscribe, fan, rate and like my videos. i learned that it is very important for my viewers to do this because it helps youtube know people like me. i need that to happen, so please support me by doing this. :) my love to you guys! 

Thursday 17 November 2011

Yesterday's mani, updated


Hello dear readers :) The mani from yesterday looked a lot cooler in the pictures than it did in real life, certainly when there's not a sign of the sun to reveal at least some of my effort haha. So for today's post I have the updated version which I made by filling in a few stripes with Essence Bella. Doesn't it make a cute couple with Almost Famous? :) Thanks for stopping by guys!

SAVE THE EARTH

Hi guys,
As of now, I don't have new nail art. I just like to share the freehand nail art that I made. I entitled it "SAVE THE EARTH" the girl in the center is holding the earth and dying tree.. It shows mother nature before and mother nature as of today... It's not actually that noticeable because I was in a hurry to finish it but I hope you guys like it!! =)
God Bless
Nail art I made for my aunt.. =)

Wednesday 16 November 2011

Yellow & black stripes


Hi everyone, for this post I have another striped mani to show you and it's bright! Not that my last mani wasn't bright enough, but tonight I felt the sudden urge to wear yellow. And that's rare, but fine with me, because I can really use some brightness in these dark, cold days that we're lately having in the Netherlands! The yellow I used is Color Club Almost Famous. I had to apply three coats for an even coverage and smooth surface. Normally I kind of avoid three-coaters, but for a yellow it's actually not that bad. Once again I used China Glaze Ink to make the stripes. In my head this mani looked better than it does in real life. Because I used a bright lamp in the pictures, the yellow is well visible. But in lower light, you can pretty much only see the stripes because the yellow kind of blends in with the tone of my skin, which looks weird haha. Maybe I'll add another color or something later, we'll see. Thanks for reading guys and nighty-night!

thanksgiving nail, pilgrim nail, fall leaves nail, fall nail, autumn nail, fall nail art, autumn nail art, thanksgiving nail art, native american girl, pilgrim boy, funny nail art, cute cartoons, cartoon nail, robin moses thanksgiving,


THANKSGIVING characters pilgrim and falling leaves: robin moses nail art design tutorial 513

here is a cute cartoon thansgiving scene that i did on juicy. she wanted them up this year, i wanted them for next year. she won. hahahahahaha, shes been winning a lot lately :) have a great holiday! see you guys soon! please pass these out to everyone who will love them, spread the word and please say "inspired by robin moses" if you try and show them so i can find new girls. this design was inspired entirely by juicy...hahahahah :D

Monday 14 November 2011

Black & blue stripes


Like many other nail bloggers, I too have been a terrible nail biter in the past. It started at age five or six and it continued till I was about nineteen. Nail polish has always been a hobby, ever since I got my first bottle of nail polish (silver, holographic bar-shaped glitter!) from my aunts. But I almost never got to enjoy my polishes on my nails because I could never fully get out of the habit of biting them. But then I stumbled upon nail blogging world and rediscovered my love for nail polish, I pampered my nails, started doing nail art and now I'm talking to you guys ;-) Since two years I'm finally able to say that my nail biting days are pretty much over. But then I went to the movies (In Time)... 109 minutes later I got two little nubbins on each hand, what just happened?! Sigh. Guess the movie was even more exciting than I thought, lol. Anyways, that's why I couldn't post anything earlier than planned, my nubs were really too short to share them with the world, haha. And honestly they still are, but oh well, that's why I made some nail art to distract you all. Hah! My base color is H&M Blue My Mind, I love how bright the color is, a true eye-catcher. I'd say it's a darker periwinkle blue creme, the formula seems a bit thick sometimes, but it's still fine and needs the average two coats for full coverage. On top I did some free hand stripes in random sizes with my favorite striper polish China Glaze Ink. I really like these simple stripes, because they're so easy to achieve plus the vertical pattern can make shorter nails look longer, which I kind of need right now :P Hope you like it too and thanks for reading if you made it this far. Good night!

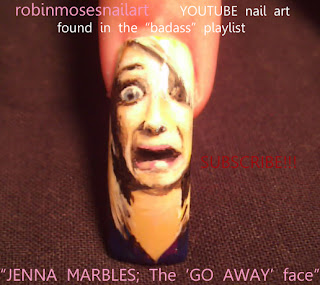
jenna marbles nail, jenna marbles nail art, jenna marbles portrait, jenna marbles the face, robin moses portrait, jenna marbles the go away face, pink nails, pink streetwalker, hot girl disguise, pink hooker nails, robin moses paints jenna marbles


jenna marbles portrait on a nail. please pass this to jenna if you are her fan, i want her to see it!!

(above) the initial jenna marbles "the face" portrait tutorial that was lost on my video camera. i back up all pictures for when i am copyrighting the material i paint. so here is the lost full set. it was hilarious and a bit more simple. this one was super fun to me and i had a great time with it.

update: the first upload link to jenna marbles was super bad quality. i had to RE:UPLOAD it and so now the links work. it is so important that you guys show this to jenna and truly this has been such a hard tutorial for me, technically. lol. i have had NO LUCK with this video at all, i hope hope that it is well loved in return, because boy.....it gave me a hard ass time! xoxoxoxo

working link posted here
just in case :D xoxoxoxox 

Friday 11 November 2011

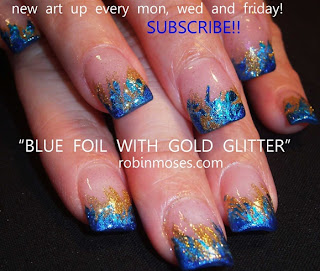
turquoise nail, blue nail, green nail, turquoise faux finish, faux finish, party nails, red glitter nail, new year nail 2012, red and black nail, holo glitter nail, holographic glitter MAC, party girl nail,


TURQUOISE faux finish sponge technique: robin moses simple nail art design tutorial 510

turquoise faux finish by robin moses nail art design blue and green nailart to try that is simple and fast!


simple and fast nail art for party girls. christmas parties and new years eve 2012 nailart! 
buy the glue at scraperfect.com and the glitter at inaz cosmetics on facebook
 
brilliant!  

Orly zigzag


Hello everyone! Since I didn't have much time to do my nails this week to post something, I decided to dig in the vault, look what I found! It's a zigzag tape mani I did in the summer with China Glaze Recyle for the grey and Orly's Viridian Vinyl and Purple Pleather for the tips, they were amazing to work with for the taping by the way. I expected the colors and zigzag pattern to pop more against the grey, but it became quite subtle actually. Still I like the matte and glossy finish combined in this mani :) What do you think about it? Thanks for reading!

Tuesday 8 November 2011

Vintage clouds


Hi guys! For this post I have another request to show you. A little while ago I received an email from a reader who wanted me to come up with a funky mani for her informal dance soon. A few colors she liked were teal and coral, so I combined them in this "funky clouds" look. I like how simple this design is to achieve. Just pick three matching colors, one for you base color and two for the cloud shapes on top. The clouds are made by applying three strokes of polish next to each other, each smaller than the one before. My tip is to leave enough polish on the brush (but not too much!) so that when it touches the surface it will leave a nice, round dot as start point. This doesn't even need a lot of precision and you can just use the brush from your polish for this. And that's it :) Though I would advise using a fast drying top coat afterwards if you don't want to wait too long for your nails to dry, after all it's three coats of polish. (Four if you include base coat.) I like the way it looks here with plain cremes, but for a more festive look, a layer of (iridiscent) glitter can be added.

Below you can see the same look with China Glaze Midnight Kiss on the tips, which I made first. But after I took the pictures I noticed how Bella matched the rest of the polishes better so I just redid everything, for your viewing pleasure haha. Have a great night!

The polishes I used:
Essence - What Do U think? Version 1 (it looks less orange in real life)
China Glaze - For Audrey
Essence - Bella


Monday 7 November 2011

coffee nails, coffee nail design, brown nails, taupe nails, blue nails, easy nails, nails magazine, nailsmag, blue french tip, earthtone nails,


"Coffee Drinker" inspired by Oliver Ray. 
"simple nail art design" featured in NAILS magazine December 2011

ROBIN MOSES HITS FRANCE! exclusive interview!

translated link
Gaelle did one of the most beautiful interviews ever in the november issue of PassionNailart. I believe you pay for the issue through paypal and see it in french and in english. I got to talk about my favorite french authors, films, cathedrals and much more. I was invited to France! haha! Who could ask for more? ;D 


 her youtube account  

Saturday 5 November 2011

Funky clouds


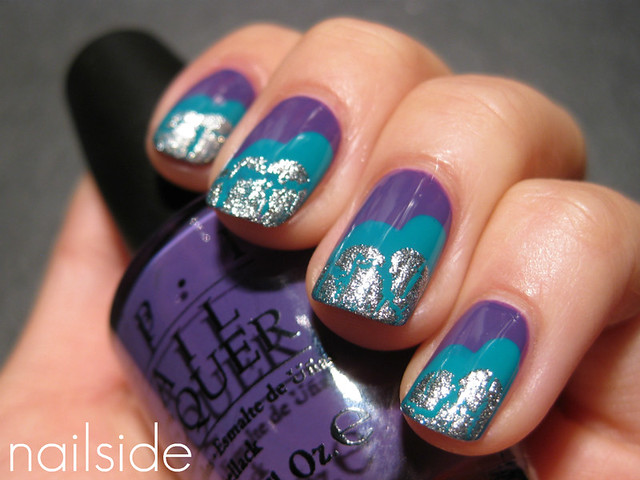
Hello everyone! I was in the mood for some funky nail art tonight but I didn't feel like spending too much time on it. And that's how I came up with these "funky clouds" you're looking at. I'm still no good at making up names for designs so don't make fun of me haha :P I started with two coats of OPI Funky Dunkey and then I applied Essence Bella on top in three quick strokes that form the cloudy shape together. After it had dried I repeated the steps a bit closer to the tips with OPI Silver Shatter, a layer of top coat and there you have it! I think it turned out pretty cute ^^ And I can't wait to use it with other color schemes. Hope you guys like it too! Good night :)

Thursday 3 November 2011

Katy Perry inspired nails


Hello everybody :) For today's post I have dice nails to show you. They're made for a reader who requested Katy Perry inspired nails. And the first thing that crossed my mind were her outfits of course! Katy has worn tons of awesome, funny, colorful outfits throughout the years, so plenty of stuff to get inspired by. One of my favorite dresses of her has to be the red sequin dice dress, I love all the glitter and the colors and it's so fabulous Las Vegas! Anyhow, what better polish to wear as the basecolor than good ol' China Glaze Ruby Pumps... One of my all time favorites. It does need three coats to cover, but it's so worth it :) And the formula is great too. I used black and white acrylic paint to freehand the dice. There  is a lot going on, but I sure can't pull off that amazing dress, so my last comfort are these nails, lol. What are your thoughts on these Katy Perry's dice dress inspired nails?


Source: http://www.4tnz.com/content/katy-perrys-dicey-dress-choice

Thank You + Vacation Pix

Hi guys!
I would like to thank all those who voted for my entry on Bundle Monster nail art contest. I was included in the top 10 finalists.. When bundle monster picked the top 3 winners., I was one of them! (I got the 3rd spot!).. Thank you very much guys...

My Halloween Nail art
JESSICA "PUMPKIN PATCH"
Nail art I made for my sister.
I also want to share my All Saints Day pictures with my family! We went to mt. Samat together with my 2 sisters... I also included some vacation pictures..
Mount Samat
Dambana ng Kagitingan

Mount Samat (Tagalog pronunciation: [samat]) is a mountain in the town of Pilar, Province of Bataan, in the Republic of the Philippines. Located on the summit of the mountain is Dambana ng Kagitingan or Shrine of Valour, a memorial shrine complex built to honor and remember the gallantry of the Filipino and American soldiers who fought during World War II.

Consisting of a colonnade and the huge Memorial Cross, the sentinel of Bataan, the park was commissioned in 1966 by then President Ferdinand Marcos, aWar Veteran himself, for the 25th Anniversary of the Second World War.[1] The white Memorial Cross stands as a remembrance to the soldiers who fought and lost their lives in the Battle of Bataan. From the colonnade and the cross, one can view Bataan, Corregidor Island and on a clear day, the city of Manila. The shrine complex also includes a war museum with a wide array of collections from paintings of the Philippine heroes to armaments used by the American, Filipino and Japanese forces in the heat of the battle.

My 2 sisters.. ♥