Showing posts with label White. Show all posts

Tuesday, 26 March 2013

Lace and Buttons


I keep thinking everything at school will eventually slow down so I can blog more again, but I don't think it ever will! Yikes. Good thing I discovered a couple of old pictures on my memory card, such as today's. ;-) I totally forgot about this mani and I'm happy to have found these pictures again, because I personally think it's so cute! ^_^ The basecolor I used is China Glaze First Mate (probably my favorite navy creme polish) and on top I made a simple lace design and three tiny buttons with a white striper and a dotting tool. Hope you like it!

Tuesday, 19 February 2013

31 Day Challenge, day 24: Inspired by a Book


Hi everyone! Seems like the last couple of challenges were a lot harder than I expected. With the previous two and today's book challenge in particular, it took me quite a while to get inspired. After lots of thinking I decided to go with the character Janneke of the Dutch Jip en Janneke stories by Annie M.G. Schmidt that I grew up with. Fiep Westendorp is the one who brought the duo further to life with her adorable and iconic illustrations in black and white. I absolutely love the simplicity of her drawings which makes the characters so easy to recognize and therefore also... perfect for on the nails! ;-) I paired my freehanded Janneke accent nail with a girly polka dot pattern, using a black creme and China Glaze Designer Satin for the dots. It wasn't the easiest job, but I'm happy with how it turned out. ^_^

Image source

Friday, 8 February 2013

31 Day Challenge, day 22: Inspired by a Song


Hey everybody! I'm at day 22 of the 31 Day Challenge, which means I had to pick a song as inspiration. I never thought this challenge was going to be easy, but man, it was so much more difficult than I'd expected! A lot of songs have abstract titles, which are really hard to capture into something recognizable on the nails. And I did want to make something that people were able to recognize, rather than something artsy and abstract that could actually be anything. So I hope you guys indeed saw that pictured on my nails is a train. ;-) The symbolic train of John Mayer's Stop This Train. I think it's a touching song and I especially love the live version of it from his album Where The Light Is.
I really wanted to portray the speed and enormous size of the train, so what better way to do that than making it in Art Deco poster style? :-) The red basecolor is OPI's Big Apple Red, and for the vehicle I used a couple of different polishes and stripers, plus a little sponging for the steam and lights. At last a layer of Essence Matte topcoat and it was finished. Hope you like it!

Saturday, 15 December 2012

Mint Winter


Hello, dear readers! Here are pictures of my first winter mani this year, on my shorter nails. Stress made me bite every single of them. :-( That didn't happen in years! I still like my nails a tad longer, but that doesn't stop me from painting them. :-) The lovely basecolor is Catrice's I Sea You and on top I drew the bare Christmas tree from my last tutorial, plus cute snowflakes that you can practice yourself with this tutorial from last year. Have a great day!

Friday, 30 November 2012

Arrow Tail


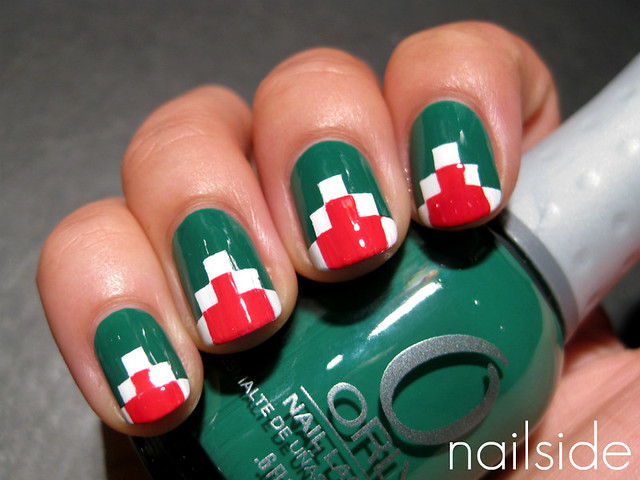
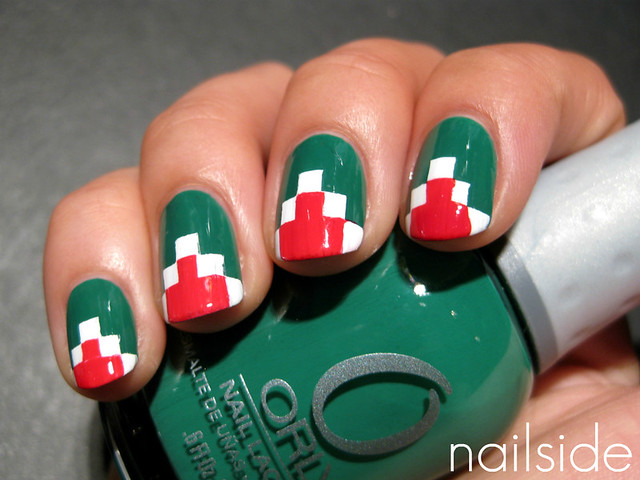
There wasn't a lot of nail painting for me this week, school work took up most of my time. I did do another "arrow tail" design which I came up with while improvising for the tribal print challenge in my last post. There's just something relaxing about drawing the design that makes it such a fun task to do.
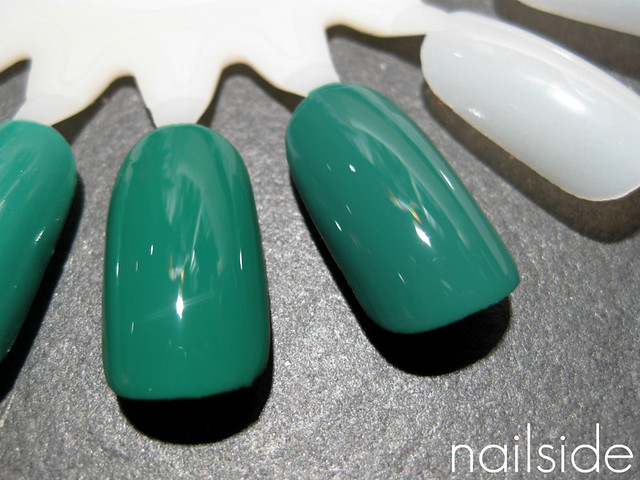
This time I used Orly Viridian Vinyl as my basecolor and I truly fell in love with it again. It only needs two smooth and fastdrying coats for opacity and the color's just fantastic! Finally I made the arrow print with a white striper. No topcoat was applied, because the satin-matte finish of Viridian Vinyl is too pretty!

Monday, 5 November 2012

31 Day Challenge, day 13: Animal Print


Hello readers! For this post I'd like to show you my attempt on challenge 13 of the 31 Day Challenge: a very literal animal print. It was a bit of an experiment as I used other materials besides nail polish: a Staedtler permanent marker and an Edding Deco Marker in white. Once the blue basecolor was dry (nameless polish from Claire's), I freehanded the curious animals on top. The markers seemed to attach well on the matte surface, the polish just needs to be completely dry before you can draw on it.
The animals in this print were supposed to be cats, but with a little imagination they can be any animal you like... Dogs, mice, pigs, ferrets... If you squint your eyes, they can even be the little black soot creatures from Miyazaki's Spirited Away. Oh, yeah, definitely going for the squinting. Love that movie! ♥

Saturday, 8 September 2012

31 Day Challenge, day 9: Rainbow


Day 9! This time the challenge was to make rainbow nails. I was looking really forward to this challenge, even though I knew it was going to be challenging indeed. In the end I came up with this very simple look with colored strokes. Basically I used the technique I also use to make my cloud manis, only using a different color with each stroke. I really like the end result, all the colors together make me so happy! Maybe also because they remind me of a box full colored pencils. :3
If you like this look, I hope you try it out yourself too. It's a quite easy way to create that oh-so-lovely rainbow effect. ^^ Thanks for reading!

Polishes I used over China Glaze Snow:
Essence - Beauty On Tour
H&M - Peach Me Soon
Color Club - Almost Famous
Catrice - ACid DC
Safari - #100
Essence - Via Airmail!
China Glaze - Gothic Lolita
Essence - Sending You Kisses

Sunday, 26 August 2012

31 Day Challenge, day 7: Black & White


Hi everyone! Welcome to day 7 of the 31 Day Challenge; black and white. I love black and white manis so I was very excited about this one. I expected myself to do a full nail black and white pattern but eventually these skittled zigzag tips were the result. Basically I made randomly zigzagging black tips and added the white and colored triangles later. It reminds me of the fierce French I did a while back, only funkier. :-) Thanks for stopping by!

Monday, 11 June 2012

Viva La Lightning Bolt


Hello dear readers! I'm still very busy with school, only two more weeks to go! I've still got a lot of things to do, but right now I just want to show you these nails. :-) Yesterday I wore a brandless plain white creme. It took three coats to get opaque and it took forever to dry, but it was totally worth it. Who knew I could like white nails this much! But sadly the polish already chipped after one short day, so today I added these lightning bolt tips with Essence Viva La Green. I hadn't done lightning bolt tips for a long time, I almost forgot how fun they are to make. ^^ Finally I added a bit of glam with OPI Spark The Triomphe. It's so sparkly! ♥

Sunday, 13 May 2012

Full Tribal Mani


Hello everyone! And happy Mother's Day to all the mommies out there. :-) Yesterday I already showed you my tribal accent nail. And as much as I liked it, I couldn't stop wondering how a full mani with the black and white pattern would look, et voilà! ^^ I had a lot of fun working on it and I can't wait to do it again in different colors, any color schemes you suggest?

Saturday, 12 May 2012

Black and White Tribal


Oooh, more tribal nails! I hope you don't mind. :-) I just love how detailed it looks with only little effort, especially if you use it for an accent nail only. Also it's a cute eyecatcher that way and a great excuse for being lazy, haha. The tribal print was freehanded with a white striper polish over black and the purple is OPI's Planks A Lot. Thanks for stopping by!

Wednesday, 2 May 2012

Queen's Day 2012


Hello everyone, here's my belated Queen's Day post! On this national holiday everybody wears orange and sometimes with hints of the Dutch flag, so that's exactly what I did here. I started with the orange and then layered the red, white and blue on top, using tape for crisp lines. This mani took forever to make as I had to wait three times in between for my polish to dry before I could place the tape on my nails, but it was definitely worth it and I received many compliments on it that day. ^^

To show our country a little love on days like these, the Dutch brand Koh set up a little collection with 'Dutch' colors which I've used for my Queen's Day mani. Below are swatches of each polish.


Brilliant Red!. This is a classic red jelly with a hint of orange, it's very pretty and bright but not unique. It does have a great formula and application, like I'm used to from most jellies. This was two coats, and as you can see it still shows a tiny bit of VNL but strangely it doesn't bother me much in this case.


Crystal!. This was my second favorite polish from these four (and the only one I didn't include in my mani because it was too sheer). I honestly expected to hate it as it's a frosty white which looks very dated to me, but I ended up loving it! When you think of frosts, you think of brushstrokes, but fortunately Crystal! doesn't suffer from those with its easy application. :) It takes three coats to get full opacity, but it's totally worth it in my opinion. And I know it's not even summer yet, but Crystal! would be a great color for winter too, look at that pearly shimmer! I already start to feel Christmassy when I look at it haha.


Rock Chick!, my favorite from the bunch. ^^ This cobalt beauty is so bright that it looks like a neon in certain lighting, really gorgeous... And like Brilliant Red! this is a jelly with a perfect, rich formula. It covers perfectly in two smooth coats, love it!


And the last one is Dutch!. Like many other girls, I'm not a big orange fan when it comes to nail polish. But it is the perfect orange for Queen's Day or to show our team some support during the UEFA European Football Championship this summer! Pictured is three coats, once again the application was very nice.

Thanks for reading!

The products in this post were sent to me for review.

Friday, 6 April 2012

A Broken Heart


Hi everybody! For this post I have a broken heart for you. Nothing to worry about though, I just thought it would be a cool design as I'm still experimenting with sheer polishes. :) I used my vertical lightning bolt design, then I painted the heart on top with a stencil I made from tape (like I used in this mani). I'm not sure if I like the colors I used, but I'm glad the idea I had in mind came out pretty much the way I wanted, yay! Thanks for reading! :)

Polishes I used:

H&M - Bella's Choice
Essence - Stamp Me! White
Color Club - Warhol

Friday, 9 December 2011

Christmas scene


Hi everyone :) For this post I have another Christmas mani. Since I haven't made any Halloween looks this fall, I'm planning on catching up some holiday manis with this year's Christmas ;-) Anyway, this week's been terribly busy, so I've been wearing Essie Your Hut Or Mine for the last three days. But today's weekend, yay! So I finally had time to update my mani. I added a Christmas tree for my accent nail, using tape. You know, if you think about it, a Christmas tree isn't that different from a lightning bolt! I mainly used tape triangles which I placed underneath each other on each side of the tree to create the zigzag lines. For a little sparkle I added silver glitter on top and a larger piece of glitter as my tree topper. On the rest of my nails I made "funky clouds", representing a snow scenery and later I added the "snow" with a dotting tool. In retrospect, I think the dots are a bit too much, so I doubt if I'm going to keep this mani longer than a day. But oh well, that means I can do my nails again tomorrow ^^ Thanks for reading!

Polishes I used:
Essie - Your Hut Or Mine
Essie - Lion Around

Orly - Pure Porcelain
H&M - Confetti Kisses

Monday, 5 December 2011

Christmas nails with lace


Hi guys! These lacy nails were made recently when I was in a very Christmassy and girly mood, can you tell? ^^ I used OPI Big Apple Red and Konad imageplate M71 with Essence Stamp Me White!. This look is a lot girlier than I'm usually going for, but I enjoyed it nonetheless, squealing like a little child when I noticed how they matched red Christmas glasses from the Ikea was part of the fun haha :P
Thanks for stopping by!

Saturday, 26 November 2011

Birthday nails


Hello everyone! I hope you're all doing fine :-) I am, it's just a little hectic right now which is the reason of me posting so little lately. But I've got many new ideas to post once things slow down a bit, including tutorials and perhaps the start of my attempt on the 31 day challenge! I'm so looking forward to it! :)

For this post I'd like to share this birthday mani with you that I made for one of my dear readers. Since I am always occupied with other things that need to be arranged on my own birthdays, and usually just end up with a simple creme or glitter on my nails because of the lack of time, I decided to make something cute that's not too difficult or time-consuming to recreate. My accent nail, is (obviously) a birthday candle! I began with three coats of yellow (M67 by Make-Up Studio, a new brand!). Then I used a pink for the "cake". Once it had dried I added the candle, the little flame and wick, and there you have it :) On the rest of my nails I'm wearing China Glaze For Audrey. I painted the irregular stripes that I'm so into lately, with a white French manicure striper. What I love about those is how opaque most of them are, as opposed to regular white polishes. To complete the party look I added an iridiscent glitter (OPI Last Friday Night), it's sparkly and still reveals the stripe design underneath. And that's basically it! Happy Birthday! ^^


Thursday, 3 November 2011

Katy Perry inspired nails


Hello everybody :) For today's post I have dice nails to show you. They're made for a reader who requested Katy Perry inspired nails. And the first thing that crossed my mind were her outfits of course! Katy has worn tons of awesome, funny, colorful outfits throughout the years, so plenty of stuff to get inspired by. One of my favorite dresses of her has to be the red sequin dice dress, I love all the glitter and the colors and it's so fabulous Las Vegas! Anyhow, what better polish to wear as the basecolor than good ol' China Glaze Ruby Pumps... One of my all time favorites. It does need three coats to cover, but it's so worth it :) And the formula is great too. I used black and white acrylic paint to freehand the dice. There  is a lot going on, but I sure can't pull off that amazing dress, so my last comfort are these nails, lol. What are your thoughts on these Katy Perry's dice dress inspired nails?


Source: http://www.4tnz.com/content/katy-perrys-dicey-dress-choice

Monday, 3 October 2011

Aztec tips and a comparison

Left Orly Lucky Duck, right OPI Jade Is The New Black
(Completely on the left is Konad Solid Pop Green)

Hello everyone :) Last week I attempted my first aztec nails, or should I say pixel nails? The nice green you see is Orly Lucky Duck, it had an amazing formula, a bit in between a jelly and a creme, which made it very easy to apply. So you'll end up with a glossy and opaque finish after two coats. On the swatches of it online, it looked more turquoise, that's why I loved it so, but in real life it leans a lot more towards green. Still very pretty, though I don't think I needed it, since I now find it very similar to a polish I already had: OPI's Jade Is The New Black. They're not dupes, JITNB is a bit dustier than Lucky Duck as you can see, but still I think they're so similar, that you probably won't need both. They both have a great formula and cover in two coats, also the drying time of the two polishes is pretty good, so the big difference must be in the brush/cap (or price). I like both the rubberized cap of Orly and OPI's Pro Wide Brush, but you might not agree with me ;)

About the nail art, I used tape strips to make the aztec pattern, what else, right? ;) The white is Essence Stamp Me! White and the red is OPI's Big Apple Red. Yes, it took me forever to make, haha, but I'm quite patient when it comes to nail art, so I'd do it all again in a heartbeat. Though using it as an accent nail would be a nice compromise, like the polished perfectionist AmyGrace did here. Accent nail FTW, right! She's awesome. And that's it for this post, good night!

Thursday, 19 May 2011

All in!


Hello followers! Second post today. This mani was my entry for a national nailart contest at the Dutch site Girlscene.nl, sponsored by Herôme, a Dutch nailcare brand. Herôme already had many nailcare products and since a while they also have their own nailpolish collection called World Inspired Colours, consisting of 79 polishes, all named after big cities all over the world. The challenge was to let your nailart creation be inspired by such a big city, so guess which city I picked... That's right, Vegas, baby! Though I've never been to Las Vegas, or anywhere in the U.S., movies, TV shows, music, images and internet let you taste a little of what it's like there. So based on that, Vegas (partly) reminds me of money, luxery, odds/luck, decadence and glitter, all in the surounding of hundreds of casino's. And that's what I wanted to capture on my nails. I spent ages on this mani, but the price to be won would be worth it! The winner of the contest would receive the entire W.I.C. collection of 79 polishes! So all this time I had my fingers crossed... hoping they'd pick me out of all the entries... Though my hopes weren't high, since they must've had hundreds of entries. But! Today I received an e-mail from Girlscene... saying I had won! My Las Vegas mani had actually been chosen as winner of the contest! I just couldn't believe it and still don't. I've never won anything besides small coloring-contests when I was little, haha. So that e-mail really made my day... My week! Month! Year! You know... And it feels like a little make-up for not winning Orlica's Disney contest, hahah :P

All the designs are freehanded except for the index finger which needed a little help from tape. And that little shiny thing on my ringfinger is a rhinestone, pretending to be a roulette ball.

Thanks for reading this looong post, if you've made it this far, hahah. And have a great night :)

Tuesday, 19 April 2011

I ♥ geometry


Hey guys! Today I want to show you a new tape mani, in classic black and white. For the pattern I had to cut many tape strips, which wasn't the hard part, but removing all those things! And because I needed so much time to remove each strip one at a time, the black polish had already dried which made my lines less crisp. So I had to touch up a few lines afterwards. As the title of this post says: I love geometry! Geomatric patterns work so well on nails and often are even visible from a distance. The black and white I used are my favorites: Color Club Where's The Soiree? and Essence Stamp Me! White. Both are very opaque and fast-drying. Finally I used a coat of Seche Vite on top. And that's how this was done, see ya! :)