Showing posts with label Hema. Show all posts

Monday, 17 December 2012

Tutorial: Holly Leaf


Hello, creative person! Welcome to my holly leaf tutorial. Like the design it is inspired by, the freehand cloud, it's quick and simple to make, even with the small additions. What I like about this design (apart from being very Christmassy ^_^), is that it combines the use of different tools, it's a great way to practice both freehand and dotting skills. But once again, it's fairly simple. I hope you'll give it a try!


Start with a green basecolor for the holly and let it dry. Use a basecoat underneath if your polish tends to stain.

Then use a contrasting color to paint a few vertical strokes next to each other, making each one shorter as you near the other side of the nail (like shown more detailed over here). Start each stroke by placing the tip of the brush on the surface and wait till enough polish has dripped off, forming a round starting point. Try to leave enough polish on the brush to do this, but make sure it's not too much either to prevent having a thick, lumpy layer that will take forever to dry.
Tip: If your polish comes with a (big) flat brush, just twist it 90° and use the side. It's easier to make those round edges this way. :-)
Now we're going to give the leaf some veins, using a dark colored striper polish. Start with one main vein across the length of the holly, to which you then add a few smaller veins.
It's likely to use a green polish for this task, as the leaf is green. But if you don't own any, a black, brown or blue will work too.
A true Christmas holly isn't complete without its berries! So finish the design by adding a couple of red dots with a dotting tool. Or place a few big glitters or rhinestones instead, for that extra bit of oomph!
At last a layer of topcoat, et voilĂ .


I would absolutely love to see your attempt on my design, so feel free to leave a link to your creation in the comment section!


The polishes I used in this post are OPI Jade Is The New Black, Color Club Artsy Crafty, Janet striper polish #119 and P2 Fever.

Saturday, 24 November 2012

31 Day Challenge, day 16: Tribal Print


Hi everyone! Today's it's time for tribal nails with Hema #844 as my basecolor. I was just improvising with a gold striper polish (Janet #115) and this was the result. Not sure if they look tribal per se, though I did recognize an arrow tail in the design when I was done. And that's pretty tribal, right? ;-) The print was really fun to do, and quite easy as well, as it basically just consists of seven straight lines. I can't wait to try it again with bright colors!

Monday, 12 November 2012

31 Day Challenge, day 14: Flowers


Hi everyone! :-) This is day 14 in the 31 Day Challenge and today's theme is flowers. I have to say the whole mani is a little bit too tacky for me, haha, but being a tad different than most of my manis, I enjoyed working on it very much. I used my trusty cloud design method to draw the petals, first with a black, then with Essence Ultimate Pink. Then I added the blue, diamond-shaped glitters for a bit of contrast. I don't use loose glitters often, but I immediately fell in love with these from Essence, named Shine Like A Star!, which I bought about a year ago. It doesn't show on the pictures, but they're actually holographic, which makes them even more awesome. Can't wait to use them again. :-) Thanks for dropping by!

Sunday, 22 July 2012

31 Day Challenge, day 2: Orange


Day 2 of the 31 Day Challenge! This time the challenge was to do orange nails and it was truly a challenge. I had a hard time coming up with something with orange as the main color instead of an accent color. Finally I decided to go with trusty clouds (tutorial here) combined with two shades of green, as I find orange to combine best with certain greens or blues. The lovely pastel orange is H&M's Peach Me Soon, in the middle you see Orly Ancient Jade and I've got Essence Bella on the tips. I look forward to my next challenge: yellow nails! See you soon. :-)

Friday, 20 July 2012

31 Day Challenge, day 1: Red


That's right! I'm finally doing the 31 Day Challange! The task for day 1 is to make red nails and this is my attempt. Okay, so it's just as much grey as it is red. :-P But I decided to allow myself to have a little bit of freedom with this challenge, hope that's okay! ;-) For this simple fifty-fifty tape mani I started with a sexy red basecolor, #85 from Hema (a Dutch department store). When that had dried, I covered half of each nail with tape and painted the other half with a thin layer of China Glaze Concrete Catwalk and Tinsel Town. After removing the tape again, this is the end result; vampy and sparkly, can't say no to that! ^^
Because I'd like to enjoy the results of each challenge for more than just a day, I'm going to have to cheat a tiny bit with the original schedule of a challenge a day. As a compromise I promise to work twice as hard on each little project. ;-) Thank you for reading!

Thursday, 26 January 2012

Happy cloud


Hi everyone :) This is how I wore the cloud design after finishing the tutorial. I used Barry M Shocking Pink, China Glaze For Audrey and Essence Let's Get Lost and combined it with Essence Bella on the rest of my nails. I love how it turned out! It's so cheerful and kind of like the opposite of the more serious grey cloud I did last week.
Also a big thank you for all the lovely comments that you guys left on the tutorial, you're the best! It makes me so happy to know it helped or inspired you. And I've really enjoyed all the awesome cloud manis that you shared with me so far, so keep them coming! See you next time. :)

Tuesday, 24 January 2012

Tutorial: Freehand cloud design


Hello everybody, welcome to this tutorial! This time I'll show you how to make the freehand cloud look. All you need for this quick and easy design is three pretty polishes and the brushes that come with it, so there's no extra equipment needed. Use this layered look on accent nails, for a full mani or... to cover up tipwear from an old mani. :) Let's get started, shall we?


First apply your basecolor and let it dry. If necessary use a basecoat underneath.
To make the cloud shape, we're simply going to apply the second polish in three strokes. Start each stroke by placing the tip of the brush on the surface and wait a little till enough polish has dripped off forming a round starting point. Start on one side of the nail and make each stroke shorter than the one before.
Tip: If your polish comes with a (big) flat brush, just twist it 90° and use the side. Now it's easier to make those round edges! ;-)
Then take your third color and make a second cloud layer below the first one. Let the polish dry.
Finally seal your work with your favorite topcoat and you're done! Pretty simple, isn't it? :)


I would absolutely love to see your attempt on my design, so feel free to leave a link to your creation in the comment section!


Polishes I used in this post are Barry M Shocking Pink, China Glaze For Audrey and Essence Let's Get Lost.

Saturday, 21 January 2012

Grey cloud


Hi everyone! For this post a grey cloud mani to match with today's weather. On my accent nail I used China Glaze Recyle, a black creme and between those China Glaze Concrete Catwalk, which is what I'm wearing on the rest of my nails too. It's the best grey creme I've got. Just two smooth coats for an even, glossy finish. ♥
I don't wear greys on their own very often, usually I just need some color to go with it. You know, to brighten things up. However, I think today's mani is cute in all its greyness :) Do you wear greys a lot?

Tuesday, 10 January 2012

Fancy clouds


Hello dear readers :) This post I'd like to share this cloud mani with you. The red I've used is China Glaze Phat Santa, I bought it last Christmas in a set with Jolly Holly and Party Hearty, which I now happily own! (For some really strange reason I thought I didn't need Party Hearty when it came out in 2010, so weird, because it's so pretty!) I'd worn Phat Santa on its own for a day, but the next day I already had subtle tipwear on some nails, so that's when I applied the layered cloud look to cover up things. Another reason why I love this design ;-) The silver and black are China Glaze Millenium and Color Club Where's The Soiree? respectively, two of my most often used polishes.
I've received many requests for a tutorial for this cloud design, so you can expect it soon :) In the meantime you can read how I make the pattern in this post. Thank you for reading!

Saturday, 31 December 2011

Nude clouds for New Year's Eve


Hello everyone! Here's a quick little post on my New Year's Eve mani. Initially I wanted to do the festive star pattern again that I wore for Christmas, but in the end I decided to go for something quick and simple instead. I don't like my nails naked, but this semi nude cloud look I like ^^ I used H&M Golden Treasure and Color Club Where's The Soiree? for the clouds and finished with a topcoat.
Have a great New Year's Eve and I'll see you in 2012! :)

Friday, 9 December 2011

Christmas scene


Hi everyone :) For this post I have another Christmas mani. Since I haven't made any Halloween looks this fall, I'm planning on catching up some holiday manis with this year's Christmas ;-) Anyway, this week's been terribly busy, so I've been wearing Essie Your Hut Or Mine for the last three days. But today's weekend, yay! So I finally had time to update my mani. I added a Christmas tree for my accent nail, using tape. You know, if you think about it, a Christmas tree isn't that different from a lightning bolt! I mainly used tape triangles which I placed underneath each other on each side of the tree to create the zigzag lines. For a little sparkle I added silver glitter on top and a larger piece of glitter as my tree topper. On the rest of my nails I made "funky clouds", representing a snow scenery and later I added the "snow" with a dotting tool. In retrospect, I think the dots are a bit too much, so I doubt if I'm going to keep this mani longer than a day. But oh well, that means I can do my nails again tomorrow ^^ Thanks for reading!
Polishes I used:
Essie - Your Hut Or Mine
Essie - Lion Around

Orly - Pure Porcelain
H&M - Confetti Kisses

Wednesday, 23 November 2011

Jitterbug's BBQ


Hello everyone! I can't believe it's already been five days since my last post! This week's been so busy, that after I had removed this mani, I didn't even have the time or energy to repaint my nails. They're actually still naked! But I'm planning on changing that tonight :) Anyhow, for right now I have this diagonal tape mani to share with you. My base color was OPI Mrs O'Leary's BBQ. But when it started showing tipwear, I decided to add Jitterbug from China Glaze to the tips, using tape. The base color was already dry, so it only took me a little while to create a fresh mani.
Talking about Mrs O'Leary's BBQ and Jitterbug, you may have seen this color combination before here, in my (matte) V-gap post, I think they make a happy couple :) Thanks for reading and see you soon!

Tuesday, 8 November 2011

Vintage clouds


Hi guys! For this post I have another request to show you. A little while ago I received an email from a reader who wanted me to come up with a funky mani for her informal dance soon. A few colors she liked were teal and coral, so I combined them in this "funky clouds" look. I like how simple this design is to achieve. Just pick three matching colors, one for you base color and two for the cloud shapes on top. The clouds are made by applying three strokes of polish next to each other, each smaller than the one before. My tip is to leave enough polish on the brush (but not too much!) so that when it touches the surface it will leave a nice, round dot as start point. This doesn't even need a lot of precision and you can just use the brush from your polish for this. And that's it :) Though I would advise using a fast drying top coat afterwards if you don't want to wait too long for your nails to dry, after all it's three coats of polish. (Four if you include base coat.) I like the way it looks here with plain cremes, but for a more festive look, a layer of (iridiscent) glitter can be added.

Below you can see the same look with China Glaze Midnight Kiss on the tips, which I made first. But after I took the pictures I noticed how Bella matched the rest of the polishes better so I just redid everything, for your viewing pleasure haha. Have a great night!

The polishes I used:
Essence - What Do U think? Version 1 (it looks less orange in real life)
China Glaze - For Audrey
Essence - Bella


Saturday, 5 November 2011

Funky clouds


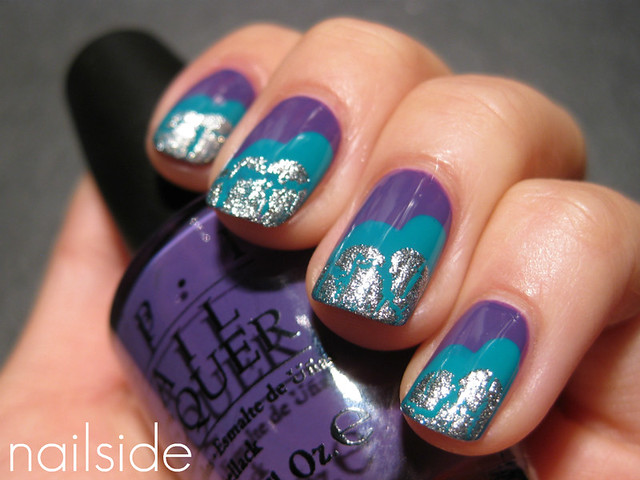
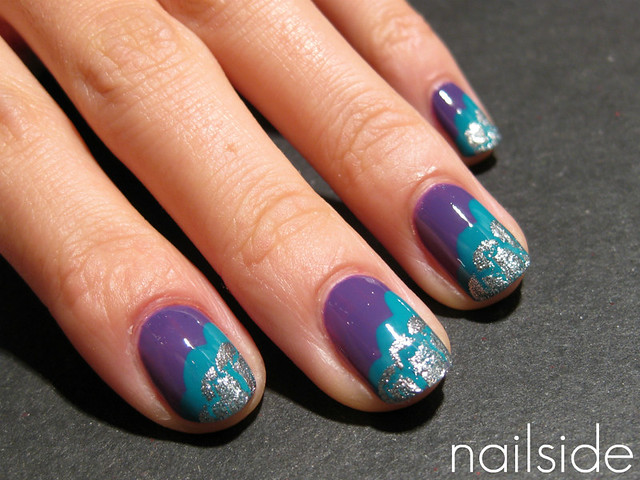
Hello everyone! I was in the mood for some funky nail art tonight but I didn't feel like spending too much time on it. And that's how I came up with these "funky clouds" you're looking at. I'm still no good at making up names for designs so don't make fun of me haha :P I started with two coats of OPI Funky Dunkey and then I applied Essence Bella on top in three quick strokes that form the cloudy shape together. After it had dried I repeated the steps a bit closer to the tips with OPI Silver Shatter, a layer of top coat and there you have it! I think it turned out pretty cute ^^ And I can't wait to use it with other color schemes. Hope you guys like it too! Good night :)

Monday, 24 October 2011

Pyramid tips with Essie Fair Game

Eeek! Tipwear already...

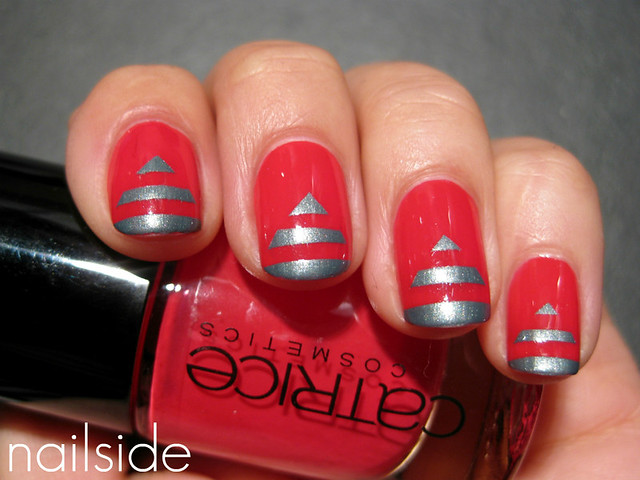
Hi everyone! These pyramid chevron tips were made with Catrice Raspberry Fields Forever and Essie Fair Game. Both polishes are amazing to work with. Raspberry Fields Forever is a bright folly red, which has a pink hue that's much better visible in real life. It has the great formula and easy application that I'm used to from most of Catrice's creme polishes, I only used two coats and a layer of Seche Vite, shiny! Because Fair Game has that hint of blue that makes the polish so special, I thought it would look nice next to the pinkish Catrice. I just love the combination of pinks and blues, no matter how subtle ;-) I've never worn Fair Game as a full mani and question if I ever will, because as much as I like it, I just think it works better as an accent next to other colors. At least, on my skintone that is, I bet it would look gorgeous on people with a nice tan!

Wednesday, 21 September 2011

Turquoise pyramids


Hello everyone! How are you? I hope fine :) I'm alright, but something terrible did happen today! Somehow one nail of my left hand got teared a bit this week. I've been really good and didn't touch it for days but I guess the stress had taken over today, because I kept picking on it and now I've got a little nub there. Boohoo! So I made the rest of my nails shorter too to make it less noticeable. And so I won't be taken any pictures for a little while, because I don't like my nails this short :( But lucklily I still have a few manis from the vault for you. And today's post is one of them.
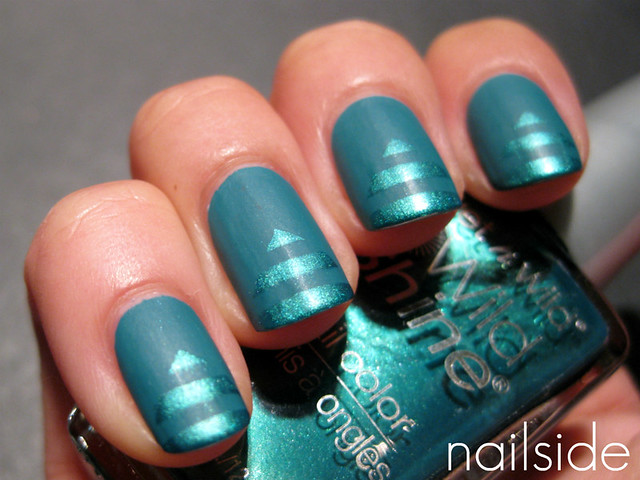
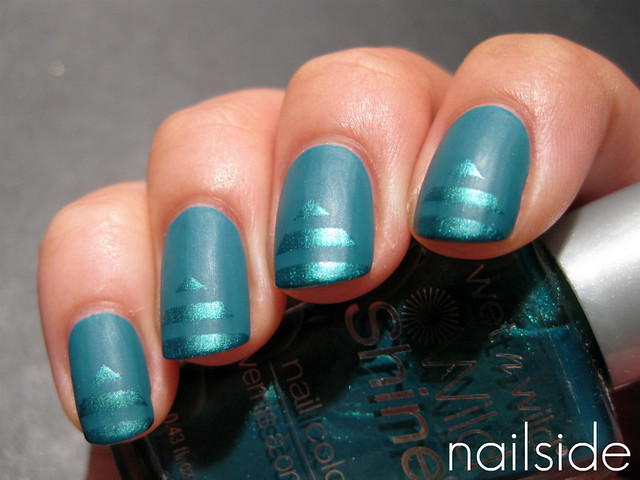
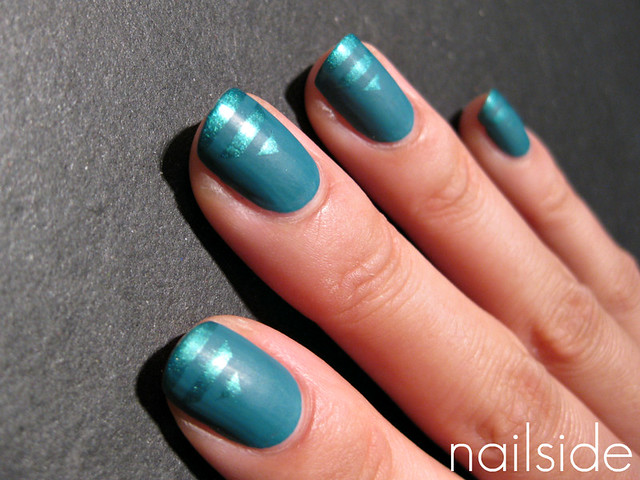
My basecolor is P2's Groovy. What a wonderful polish! I don't own many P2 polishes but my mom bought me some bottles a few weeks ago. I really loved the elegant shape of the bottles and I love them even more now when I found out how perfect Groovy was. It's a muted shade of teal, with a perfect creme formula and you can get away with one coat of it. Lovely! The next day I decided to add the 'pyramid' design, like I used in the 'military chic' mani. I used Wet 'n Wild Carribean Frost for it, which gave a subtle ton-sure-ton effect, I really like that shimmery teal polish :) And as my finishing touch I mattified the look with the sadly discontinued Essence Matt topcoat. Maybe I'll give China Glaze's Matte Magic a try when I'm through my back-ups. Anyway, enough rambling for today! ;) Have a great night!

Sunday, 11 September 2011

Military chic


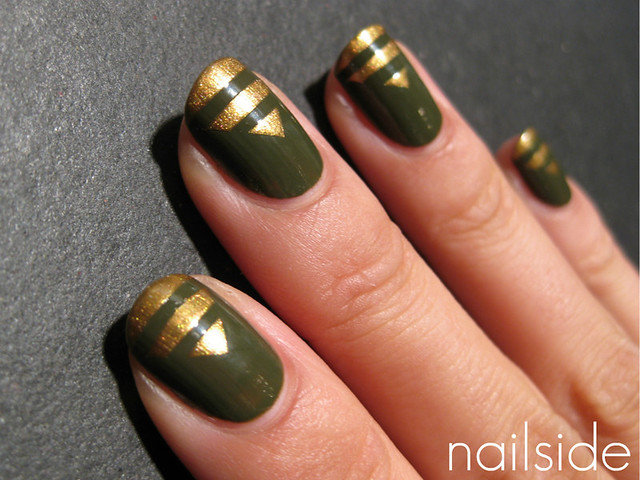
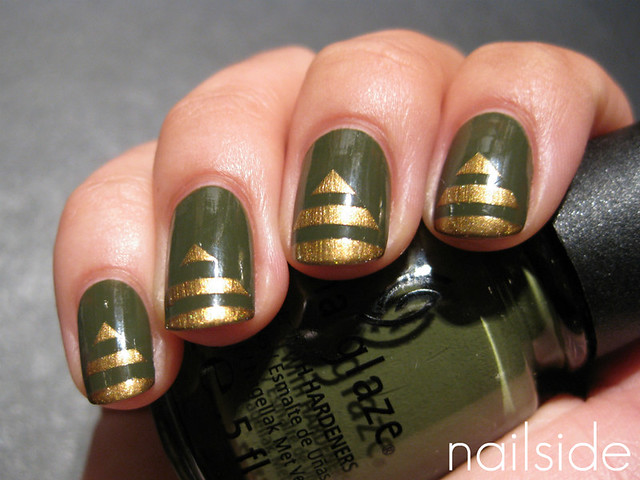
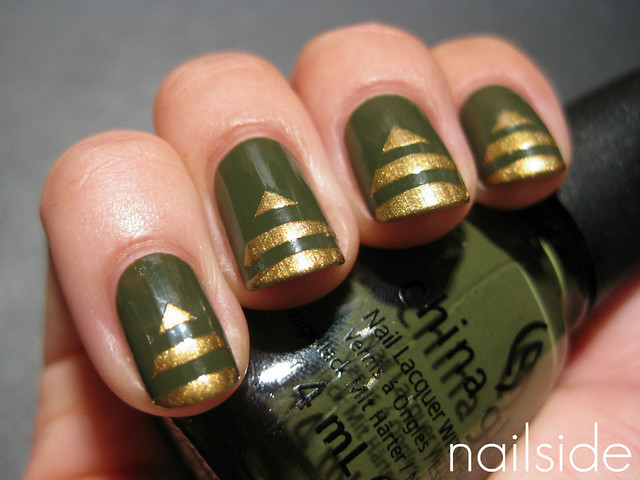
Hello guys! I hope you all had a great weekend. This look was made a couple of days ago. I was wearing China Glaze Westside Warrior from the Metro collection. What a beautiful shade of green! The application was wonderful too. I loved it and couldn't stop looking at my nails, it's unlike any other green I own. But a few days later I got tipwear on several fingers, I was bummed because I didn't want to take Westside Warrior off... So what do you do when you want to keep a polish on your nails, but it's suffering from tipwear; you go for a funky French ;) I was just playing around with my tape strips when I finally got to this design, and I must say I like it a lot! Though the whole look has a military feel, the tips reminded me of pyramids. Pyramid tips ^^ The gold shimmer I used for them was H&M Golden Treasure. It's an antique shade of gold, very pretty and very nice for tape manis. The formula is smooth and it doesn't dry too quick :) And a little by the way, these pictures were made under my boyfriend's granny's lamp, which belongs to our appartment now. Apparently it's great in mimicing sunlight! And that's awesome, because it means I can keep taking my pictures, even in the winter! Regardless of the weather and whenever I have time to, hooray! Have a great night everyone and I'll see you soon :)

Monday, 30 May 2011

Girly lightning bolt


Hello dear readers, I felt it was time for a lightning bolt mani again :) And it became a quite girly one. The pink base color I used is called Sexy Lady, the silver is Millenium and both are from China Glaze. As my final color I used my favorite black Where's The Soiree? from Color Club. But just black was a little too plain for me today, so I added a black jelly with silver glitters from Hema to it. The silver glitters aren't very visible on the pictures but they are in real life and go well with the silver chrome finish of Millenium, if I do say so myself, haha. Hope you all are having a wonderful day and thanks for reading!


Saturday, 21 May 2011

Evil enemy nails


Hello dear followers! After a superhero mani there should of course be an evil enemy mani as well, hahah. It's still a lightning bolt design, but this time it's used vertically instead of horizontally as a funky French. To achieve this look I placed the tape strips as described in the tutorial. Only to make the pattern vertical, the position of both tape strips had to be twisted 90°, so that's basically it. (In this case I also unintentionally mirrored the design, but that doesn't affect the final look, as long as the design's twisted 90° it will come out vertically.) How to "double" the lightning bolt is a bit difficult to explain (and boring to read, lol) so I will make an individual tutorial on how to do that soon, with pics ;)
The gold base color is China Glaze Millenium, the black Where's The Soiree? from Color Club and the dark silver foil is from Hema (a Dutch department store) and looks pretty similar to China Glaze Jitterbug and OPI Lucerne-tainly Look Marvelous.
My boyfriend thinks the mani is "badass", haha, what are your thoughts?


Wednesday, 11 May 2011

Muted skittle


Hello readers! For this post I'd like to show you a skittle mani I did recently. I was actually just swatching a few of my new polishes when I noticed they matched some polishes on my desk. These are the colors I used, starting with the one I used on my thumb.
OPI - Mrs O'Leary's BBQ
H&M - Dazzling Jade
Essence - Let Me In Pink

And this is where the magic happens, haha. Lately I've been hooked on the glitter topcoats from the Essence Nail Art Twins, I already posted about Blair and Edward. So here I layered Blair over my muted skittle, I think it really adds something special. What I love about Blair is the different sized glitter and also the fact those glitters aren't "plain" silver, but dark silver/grey, which I don't see that often.


And some of you might have already expected the following... ;) Matte topcoat!
Thanks for visiting :)