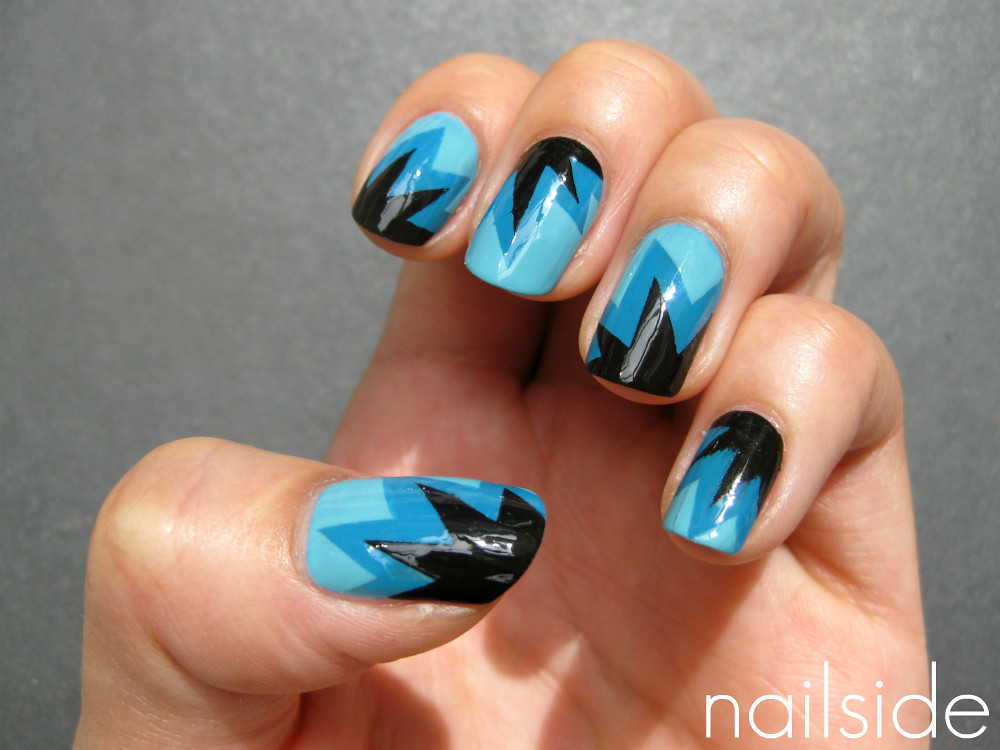
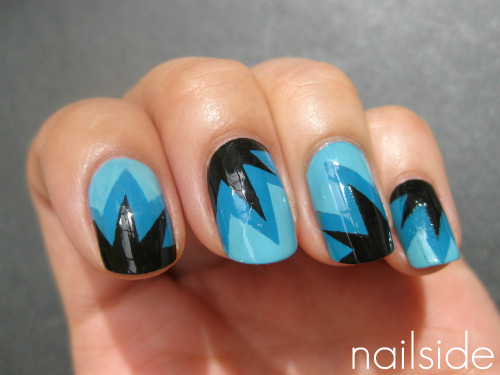
Hi everybody! Last post I showed you the amazing suede version of Suzi Skis In The Pyrenees from OPI. Because it dries so fast, it's a perfect basecolor for tape manis, such as today's. I covered half of my nails with triangle shaped pieces of tape and used my trusty black polish (Where's The Soiree? from Color Club) on top. Then I removed the tape strips and felt like a rock star... Rock on!
Showing posts with label Zigzag. Show all posts
Tuesday, 9 October 2012
Dark Zigzag
Labels:
All tape manis,
Black,
Color Club,
Creme,
Grey,
Matte,
OPI,
Shimmer,
Silver,
Zigzag
Saturday, 14 April 2012
Nude Zigzag
Hi everyone! How are you? I'm liking semi-nude manis more and more and they can be very simple too! Just like today's mani with zigzag French tips. Because there's no base color needed, you can immediately place tape strips on the nails. Apply a coat of Essence Chuck on top, remove the tape right away and you're done. Finally a layer of topcoat and edgy nails are born! :-) What's your thought on this funky French mani?
Labels:
All tape manis,
Blue,
Creme,
Essence,
Funky French,
Zigzag
Friday, 11 November 2011
Orly zigzag
Hello everyone! Since I didn't have much time to do my nails this week to post something, I decided to dig in the vault, look what I found! It's a zigzag tape mani I did in the summer with China Glaze Recyle for the grey and Orly's Viridian Vinyl and Purple Pleather for the tips, they were amazing to work with for the taping by the way. I expected the colors and zigzag pattern to pop more against the grey, but it became quite subtle actually. Still I like the matte and glossy finish combined in this mani :) What do you think about it? Thanks for reading!
Labels:
All tape manis,
China Glaze,
Creme,
Grey,
Matte,
Orly,
Purple,
Teal,
Turquoise,
Zigzag
Sunday, 24 July 2011
Blue explosion
While making this mani I somehow kept thinking about how I would name this post, 'blue explosion'. And one thing led to another and before I knew it I was singing Black Eyed Peas' Boom, Boom, Pow all day long... "I got that boom boom pow!" My apologies if you are singing it with me now hahah. Have a nice day!
Tuesday, 28 June 2011
Tutorial: Zigzag pattern tape mani
Hi everyone, welcome to my fifth tutorial! This time I'm going to show you how I create the zigzag pattern using tape. It's not very hard but it does require some patience because it involves two times of taping and the layers of polish need to be completely dry in order to do that. To speed up the process I recommend using polishes that cover in one coat or a fast drying topcoat for on top of polishes with a longer drying time. So pick three colors and let's start!
Begin with the base color you like (if necessary with a basecoat underneath) and let it completely dry. You can apply a fresh color or use the current polish you're wearing (to practice). Since there will be two more coats of polish applied on top, it doesn't matter if there's a little bit of VNL or tipwear.Now cut some triangles out of tape to make the zigzag pattern. You'll need two pieces with each layering color. The reason why I use individual triangles is because seperate pieces of tape addapt better to the round surface of nails unlike one piece of tape with the whole zigzag cut out of it in one time, which also tears a lot more easily. (The same goes for the lightning bolt design.)
Place two triangles next to each other on about a third of the nail, with the points towards the tip. Make sure all the pieces of tape are completely stuck to the nail, if not use your finger or a tweezer to push them down and if needed reattach them.
Then apply your first layering color with a thin coat...
...and carefully peel off the pieces of tape right away. Let the design dry for a while and use a fast drying topcoat to shorten the drying process if needed.
Of course you can leave the design this way if you're starting to lose your patience by now, fanatics continue with step 5! :P
When the polish is entirely dry, repeat step 2, 3 and 4 with your second layering color, but now place the triangles a bit more towards the tip, covering up part of the first layering color like shown in the picture.
At last apply your topcoat, clean up and you're done! Don't forget to moisterize your cuticles afterwards, because when you've had tape on your skin so many times, it can get a bit dry!
Use the design for a full mani for eye-catching nails or cut it down to a few accent nails if you want to keep it simple or feel lazy ;)
Finally some useful tips:
- For my tape manis, all I use is regular stationery tape. But you might prefer something else, so just experiment with different sorts of tape to figure out what works best for you.
- For your base color you can use any polish you like, however one-coaters will allow you to place the tape much sooner because those are usually fast drying. Of course you can also quicken the drying of polishes that require several coats to cover, by applying a fast drying topcoat. (I use Seche Vite).
- Your layering color(s) can be either a one- or two-coater. Because you've already applied a base color, most polishes that usually take two coats to cover now will do with one.
- Though I mention cutting the tape strips as step 2, I admit it is safer to cut before applying the base color. However, if you've learned how to cut the tape without having it touch your polished nails, it can save you a lot of time.
- You might want to leave the cut strips somewhere else than the edge of your desk/table, to prevent them from getting stuck to the surface while you're busy. You do not want to have to peel them off with your freshly painted claws!
- Apply your top color in one thin (but opaque) coat, this will create crisper lines.
- When you're removing the tape strips, try to remove them individually, if you can, because most of the time your design will come out neater this way
- Using tweezers to remove the tape strips can prevent your freshly painted nails from getting smudged.
- It's not always necessary to start all over if you've messed up your design, often a little touch-up with a nailart brush can solve the problem.
- If you want to use a matt topcoat, use a regular one underneath. My experience with matt topcoats is that they smudge the design very easily, even when it's completely dry. Applying a normal topcoat first will prevent that.
- Moisterize your cuticles afterwards, because the tape can really dry out your skin!
- You can practice this tutorial on your old mani that you applied a day (or more) before. If you succeed, you've got yourself a fresh mani, otherwise you were going to remove it anyway!
- If you feel like this design is too time-consuming for a full mani, you can also use it for an accent nail (or two).
- Have fun and practice makes perfect ;)
I would absolutely love to see your attempt on my design, so feel free to leave a link to your creation in the comment section!
Polishes I used in this post are OPI Big Apple Red, Color Club Where's The Soiree? and Essence Chuck.
Monday, 27 June 2011
More zigzag
Hi guys, I'm still zigzagging... Today was a very hot and sunny day, so I did a zigzag in a red and turquoise combo, one of my favorites, it's so in-your-face! Which is fine by me, and it matched nicely with my turquoise flip flops :) I used Rimmel's Ruby Me for the red base, it's a beautiful, glossy orangy red jelly. With two coats, there was still a bit of VNL but fortunately I got rid of that after I applied Essence Bella on top with the zigzag pattern. The reasons why I love Bella so much, besides that it's turquoise and a creme, is that it has the perfect formula and covers in one coat, just like another fabulous Essence creme: Chuck.
I hope you like it and enjoy the rest of your day!
Sunday, 19 June 2011
Edgy zigzag
Hi everyone! I hope you all had a great weekend. I know I did. Yesterday I celebrated my boyfriend's birthday together with some friends and this is what I was wearing on my nails. I felt kind of lazy haha, so I just kept the nail art to a few accent nails :) For the zigzag pattern I started with one coat of OPI Big Apple Red. Normally this polish takes two coats to get opaque, but because the VNL would be covered by another two coats of polish later, more than one wasn't necessary. Then I used Color Club Where's The Soiree? on top and for the tips I used Essence Chuck. All in all this mani took a reasonable amount of time to make because Big Apple Red and Where's The Soiree? dried so fast on their own that the only time I used fast drying topcoat was in the end just to smooth out everything. Good night :)
Friday, 17 June 2011
Funky zigzag
Hi everyone, hope you are all doing well. For today's post I have another tape mani for you. After having done this zigzag design in my flamingo mani, I liked it so much that I wanted to do a full mani with it, in a few of my favorite colors. I used Essence Bella as my turquoise base color, then my fave black Color Club Where's The Soiree? and finally H&M Pink Summer for the tips. I added a bottle pic of Pink Summer again, because it's way too cute to be seen only once :)
Enjoy you weekend!
Monday, 13 June 2011
Flamingo inspired nails
Hi guys! There are many nail art contests hosted lately. The last two I entered have just ended and I'm already participating in the next one. This time it's the Animalistic nail art contest at Spooky Nails. I found it hard to come up with something animal-related which was original at the same time. Finally I came up with the flamingo bird, I was attracted by its corally pink color and the long, curved neck. So I went googling for some images and found some beautiful ones where the flamingos are relaxing in the water. Their pinky color formed such a nice contrast with the water and I immediately knew that I wanted to make something that would capture that contrast. I tried to keep the overall look simple by using the flamingo design as accent nails only. The colors I used were Essence You're The One (corally pink), China Glaze For Audrey and Rimmel Sky High for the tips. I also added a layer of White Cap over For Audrey on my accent nails, which is barely visible in the pics. But in the second picture below, where I didn't add the birds yet, you can see it a bit better.
There are many others participating in the contest, so please visit Spooky Nails to have a look at all the creative entries and vote for your favorite!
EDIT: Unfortunately my entry didn't win in the contest, the winner was Mada with a cute and simple, sillhouette cat creation. But I really want to thank you if you had voted for me! :)
There are many others participating in the contest, so please visit Spooky Nails to have a look at all the creative entries and vote for your favorite!
EDIT: Unfortunately my entry didn't win in the contest, the winner was Mada with a cute and simple, sillhouette cat creation. But I really want to thank you if you had voted for me! :)
Labels:
Accent nails,
All tape manis,
Contest,
Freehand,
Multi,
Zigzag
Sunday, 13 March 2011
Zigzag tape mani
Hi everyone! Today's a look with zigzag pattern, I wanted to try something new with tape. Also my nails were a bit shorter than usual so I was looking for a vertical pattern to make them look longer. And that's how the zigzag tape mani was born. Though this design might look a bit complicated, it actually looks a lot harder to make than it really is.
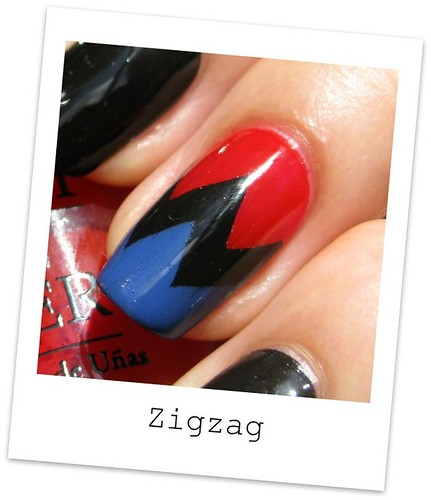
First I applied a red creme from DA, a local drugstore. After it dried I placed triangles cut out from tape on my nails. On top went Barry M's Cobalt Blue and then Matt topcoat from Essence. Now here's what makes this look easy to achieve: cutting the triangles doesn't need a lot of precision, it's okay when some are smaller or larger than others, different sized wedges make the design playful. And because the tape's placed at the beginning of the nail, you polish away from the tape which reduces the chance of 'bleeding'. This look is all about the pattern so I used a matte topcoat instead of a glossy one to bring out the design better.
Thank you for reading :)
Subscribe to:
Posts (Atom)